

Hardwood floors are a lifetime investment that deserves focused attention and care. Even the finest floors show their age with time, as patterns dull, scratches deepen and protective finishes begin to wear thin. Fortunately, restoration is almost always possible long before replacement becomes necessary.
Curious how to restore hardwood floors without sanding? First, you’ll want to evaluate the wood’s condition. Then, you’ll bring your beautiful floors back to life by repairing the damage. Here is your comprehensive guide to restoring and refinishing hardwood floors.
Assess Your Hardwood Floors Before You Begin
The ideal approach to restoration depends on what’s happening beneath your feet. This assessment determines whether you need a light touch or a full refinish.
The Water Bead Test
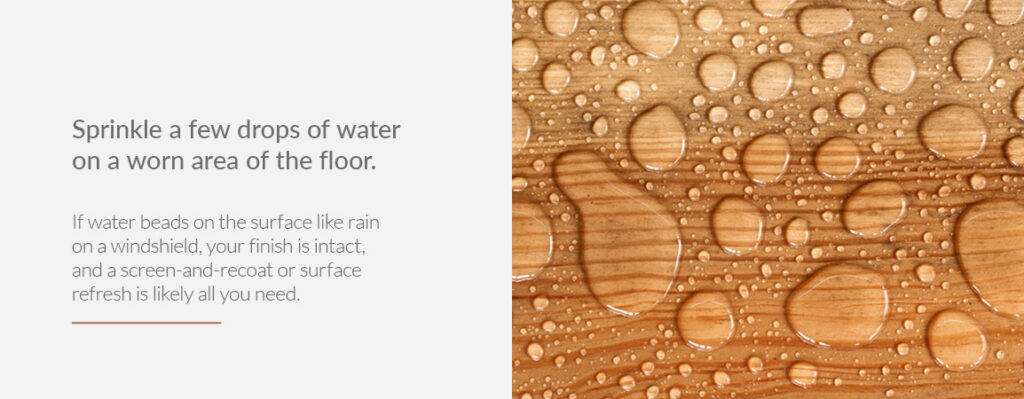
Here is a fast, reliable way to check if your finish is still doing its job. Sprinkle a few drops of water on a worn area of the floor. If water beads on the surface like rain on a windshield, your finish is intact, and a screen-and-recoat or surface refresh is likely all you need.
However, if water soaks into the wood within roughly 60 seconds and leaves a dark spot, the finish has likely failed, and you may need to complete a full sand-and-refinish to restore protection.
Signs of Surface Wear vs. Deeper Damage
Signs of surface wear include a dull finish, light surface scratches, a faded sheen in traffic lanes or a thin finish that still protects the wood beneath. Floors with these issues typically respond well to cleaning and recoating.
More extensive damage is hard to miss. You may see bare wood exposed in high-traffic areas, deep gouges that catch your fingernail, gray water staining or boards that cup or crown. Cupping means the edges sit higher than the center, while crowning means the center rises above the edges. Both symptoms indicate moisture damage, in which case you’ll need to get a board assessment before refinishing.
Steps to Restore Your Hardwood Floors
Start at the first step and proceed as far as your floor’s condition allows. Here’s how to refinish hardwood floors effectively.
1. Deep-Clean Your Floors
A thorough cleaning should always be your starting point because it removes surface debris that interferes with restoration.
Start by sweeping or vacuuming with a soft brush attachment to lift dirt. Follow with a damp mop and a hardwood-safe cleaner. Make sure your mop is barely damp — it should never leave standing water or wet streaks that can cause swelling and long-term finish damage. Let the floor dry completely before moving to the next step.
2. Screen-and-Recoat for Light Wear
If your floor passed the water bead test, stop after completing this step. Screen-and-recoat is the least disruptive way to restore hardwood floors without sanding away usable wood. Refreshing the protective layer is ideal when water still beads on the surface and you have no exposed bare wood.
To begin, lightly abrade the existing finish with a buffer and screen pad to create mechanical adhesion for the new coat. Then, vacuum all dust thoroughly and apply a fresh coat of polyurethane.
3. Sand and Refinish for Deeper Damage
Sanding and refinishing revitalizes hardwood floors that failed the water bead test. These floors may have exposed wood, deep scratches, water staining or worn finishes.
You’ll need specific equipment, including a belt or drum sander, an edger, a floor buffer and safety gear. Keep these tips in mind as you sand and refinish.
- Prep the room: Remove all furniture, seal doorways with plastic sheeting and hammer down protruding nails.
- Begin sanding: Work progressively through the sanding grits, always moving with the grain. Start with 36 to 40 grit to strip the old finish, move to 60 grit to smooth the surface and finish with 80 to 100 grit for the final pass.
- Remain consistent: Always keep the sander moving smoothly. Stopping in one spot can dig a groove you can’t repair.
- Polish as needed: Use an edge sander for perimeter areas where the drum sander can’t reach. Vacuum completely between every grit pass and again after the final pass.
Solid oak hardwood floors can often withstand multiple full sanding cycles over their lifetime, but check that your wear layer is thick enough first.
4. Apply Stain and a Fresh Protective Finish
Staining your wood is optional. You can skip this step if you want to preserve your floor’s natural color and grain.
When applying finish, always work in the direction of the grain with thin, even coats. Allow the finish to set fully before walking on it.
If you’re working with stain, the basic rule is to apply a wet coat and wipe off any excess before it dries — much faster with a cloth than a brush. For deeper guidance on polyurethane options, check out our guide to hardwood floor finishes.
Keeping Your Restored Hardwood Floors Looking Their Best
Homeowners who refinish their wood floors can recover 147% of the cost of this project, making it a worthwhile investment. Ongoing maintenance extends your refinished floor’s life by keeping your floors looking their best between refinishing cycles. Well-maintained hardwood floors can last for generations in your home.
- Sweep or vacuum regularly with a soft brush attachment — grit and debris are a primary cause of finish wear.
- Use a damp mop only — never wet.
- Put felt pads under all furniture legs and place area rugs in entryways and high-traffic lanes.
- Manage indoor humidity. Wood expands and contracts with moisture fluctuations.
What to Do When Restoration Isn’t Enough
Sometimes, despite your best efforts, floors are beyond restoration. The need to install new hardwood isn’t a failure. View it as an opportunity to make a fresh start with quality, long-lasting material.
Restoration may not be worthwhile if your wear layer is too thin to sand. Check by removing a floor vent and inspecting the board edge. For reference, the National Wood Flooring Association’s Refinishable Program requires a 3.2mm minimum wear layer for unfinished wood flooring products. You may also want to replace floors with significant board damage, such as extreme warping, rotting or buckling.
- Prefinished hardwood flooring: Prefinished flooring arrives factory-finished and ready to install, significantly shortening project timelines. Learn more about the differences between prefinished and unfinished flooring to determine which would look better in your house.
- Unfinished hardwood flooring: This highly flexible flooring option offers complete control over stain color and finish type. It is perfect for matching existing décor or creating something entirely new.
- Reclaimed hardwood flooring: Antique hardwood provides unique character and increased stability, ideal if you’re seeking something distinctive.
- Wide-plank hardwood flooring: Wide-plank flooring offers a character-filled surface as magnificent as Montana. These boards showcase the natural beauty and grain of premium hardwood.
Get Stunning Floors With Superior Hardwoods of Montana
Whether you’re restoring your current floors or exploring premium new or reclaimed hardwood options, Superior Hardwoods of Montana is here to help.
Since 1977, we’ve built our reputation on decades of hardwood expertise, superior product knowledge and a commitment to genuine quality. We carry an expansive selection of wide-plank and reclaimed flooring — all in stock and ready to ship anywhere in the United States.
Let us Guide You Through the Woods.® Browse flooring options by type, tailor floors to your unique vision, request a free sample or reach out for a quote at no cost. We’re here to help you make the best decision for your home.